Monday, November 17, 2014

HOWTO: configure PulseAudio to work with Audinst HUD-mx2 in Ubuntu

Problem

My Audinst HUD-mx2 USB DAC refused to work out of the box with Ubuntu 14.04 (same situation with Linux Mint).
Although device was properly recognized by ALSA and PulseAudio (it was visible in card list via aplay -l command and in PulseAudio GUI pavucontrol), and audinst status led was green during music playback , there was no actual sound.

After some googling I found, that I'm not alone with this problem, but no working solution anywhere, unfortunately.

Actually, I was successful (to some extent) with completely purging PulseAudio, and configure ALSA to use proper card, but the price is losing all PulseAudio features (I failed to setup proper mixing, only one application was able to output sound at a time).


Solution

Luckily for us all, there is quite simple solution: turn off pulse audio automatic device detection (that selects wrong subdevice  in Audinst hardware for some unknown reason) and load proper device module manually.

What you need to do

1. Get list of playback hardware devices:
aplay -l | grep card
Find device [Audinst HUD-mx2] [USB Audio #1]. In my case it was card 1 and device 1.

2. Open PulseAudio config file:
sudo gedit /etc/pulse/default.pa

 3. In default.pa file find
### Load audio drivers statically 
string and add command to load our device below it:

load-module module-alsa-sink device=hw:1,1

Use proper numbers obtained from step 1 in hw:1,1 (that is card number, device number).

Next, find autoload part of the script:
### Automatically load driver modules depending on the hardware available
and comment all code using # symbol:

### Automatically load driver modules depending on the hardware available
#.ifexists module-udev-detect.so
#load-module module-udev-detect
#.else
### Use the static hardware detection module (for systems that lack udev support)
#load-module module-detect
#.endif  


4. Save file and reboot
That's all! Now you can enjoy your Audinst DAC:
It works!
5. Configure your daemon settings to use 24bit output (look here for example).

Possible issues

Because driver is statically loaded, something will probably broke when you'll try to play sound without Audinst HUD-mx2 connected. I don't even want to try it right now:)


Tuesday, October 28, 2014

Extending QwtPlotItem class to plot huge arrays of data

Qwt

Qwt is a great library. It has a lot of classes, and can be used "out of the box" to perform almost every plot related task. But more important feature is library extendability. Qwt design allow user easily implement custom classes and integrate them seamlessly with standard library.

In this article I will show you how to implement custom class, derived from QwtPlotItem class (base class for all object, displayed on the plot canvas of QwtPlot), that can be used to plot very big arrays of data, with millions of points.

Plotting 101

Plotting is no more then transforming plot (or real data) coordinates to screen (widget) coordinates. One need multiply every data array point with transformation matrix and get new array with points that have coordinates in screen pixels. After that we only need to draw line segments from point to point to get plot curve on screen. In fact, this algorithm is used in QwtPlotCurve class, that allows to plot series of data.

The problem is, this method is effective only when point number is not very big. When you plotting weekly sales stats over year its ok (because there are only about 50 weeks in year). But when, for example, you are trying to plot realtime data from digital oscilloscope, performance will drop drastically (because every second you will get array of data with 4M samples).

Good for us, we can use some tricks here to reduce system overheat and get good performance.

General approach to plot big arrays of data

In two words: clipping and resampling. First one is simple – we do not want waste our processor time on data that is off screen (widget) due to axis settings, or user zooming in.

Second one is originates from the fact that every display has physical limitation – its resolution is fixed, and contains finite number of pixels in each dimension. So if you using Full HD display, it only has 1920 pixel on horizontal axis, that is not that much compared to 1M (or even more) points in our data array. All transformed plot coordinates (that are real numbers with floating points) will be truncated to integer, when drawing pixels on screen.

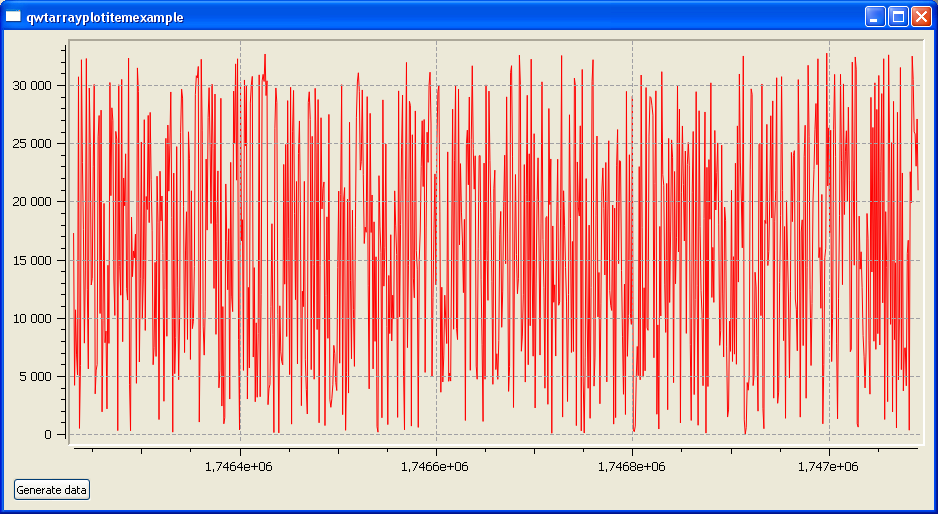
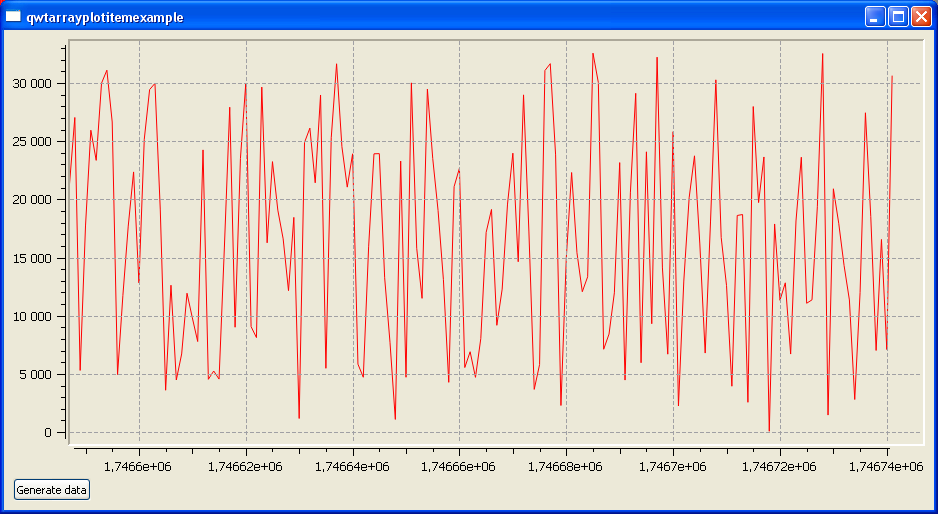
When the number of data points on screen begins to grow, there will be situation when multiple points (that have different x coordinates) will have the same x coordinate in pixels after transformation (because pixel coordinates are integer). See pictures below that illustrate this:

Points/pixels ratio is less than 1.0: there are more horizontal pixels than points in data array
Start shrinking plot by increasing points/pixels ratio. It's still less than 1.0, however.
Points/pixels ratio is more than 1.0: several data points correspond to the same pixel on screen

If, for example, we are trying to fit our series data with 1M point to full screen widget, in every screen pixel there will be 1M/1920 ~ 500 points. All lines that connect these points will overdraw each other.

And we can reduce calculation/drawing  time (and lag) if we replace that 500 points with only 2 - one is minimum value from array and second - maximum value, and draw only 1 line connecting these points.

To avoid drawing of indistinguishable lines on screen and improve plotting performance we need split our data array to N/P chunks, where N is number of points in data array visible on screen, and P is pixel width of canvas, that will be used to draw these points, find maximum and minimum point in array and draw only one line.

QwtArrayPlotItem class

First of all: you can download full example code from GitHub.
QwtArrayPlotItem class use two overloaded methods from QwtPlotItem:
  1. QwtPlotItem::draw()
  2. QwtPlotItem::boundingRect()


and one custom method SetData() that is used to pass array pointer to class. I don't use any "safe" container here because its more common when you work with ADC hardware to get your data in raw buffer, and just pass link to buffer is faster than copy data. Fill free to modify this as you want.

Ok, some more details now

Constructor


Just initialize internal variables and set some flags (autoscale attribute is enabled - we need return proper bounding rect for this item).

QwtArrayPlotItem::boundingRect()

Just iterate over array and found its maximum and minimum values. One trick used here: instead of simple comparing each value in array with current min/max, we form pairs of values and first compare values in pair - after that minimum value in pair is compared with global minimum, and maximum value - with global maximum. In this case we will have only 3N/2 comparisons instead of 2N.

QwtArrayPlotItem::draw()

Drawing and calculating method. Depending on points we need to plot (that is determined not only array size, but user zoom and plot scales set too), method use resampling or just simple plotting. Point threshold is set as twice horizontal size of plotting canvas.

By the way,  memory allocation/release for pixel data array in each draw() method call is not very good solution from performance perspective, it may be better to check if we really need reallocate buffer (if number of points is equal or less than on previous call, we can use old buffer).

Screenshots of running application
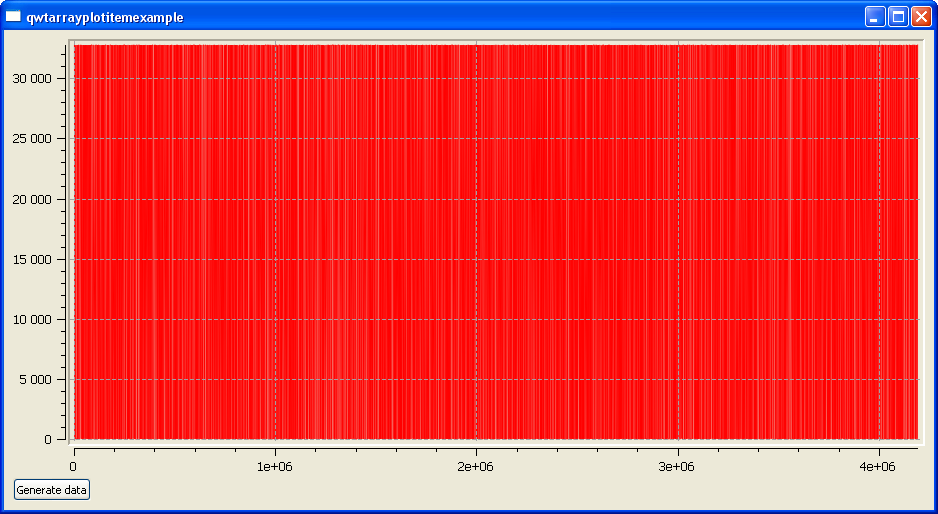
4M points filled with random numbers
After few zooms in
And finally, we can see separate data point


That's all. One more reminder - you can use GitHub link to get full example code.

Tuesday, December 24, 2013

Versioning in NSIS installer

Versioning

Versioning is very important part of software development.
In today's world, when digital downloading is the most popular way to distribute software
products, installer version must be easily recognizable. Users should know what version of the application they are using now and what they can download for update.
Server software also need version information to properly display downloading options.
NSIS installers are very convenient for web distribution - all application files are compressed and packed in one executable. The only thing programmer need to do is add version information to installer file.

Hello world (version information in NSIS installer)

The simplest way is to use defines in NSIS script as in following example:
After successful compilation of this nsi script file named "AwesomeProgram_1.0.13293.1_setup.exe" will be created.

Notice, that versioning model used in this example (and all other examples in this post too) combines four numbers:
  • Major version number
  • Minor version number
  • Time stamp in  %YEAR%%DAY_OF_YEAR% format
  • Build number

Automatic version increment

Main disadvantage of previous example is that version is absolutely static - all variables are defined in script file and you must change them manually every time you need to rebuild your installer.
It's good for a start, but eventually it will become very annoying. Also, static file name makes this code not very useful in any automatic build pipeline.
Hopefully, there are plenty of ways to automate version generation.
For example, you can get system time to produce unique timestamp:
In this example !define statement is used with /date parameter to produce unique version number (current date and time). Every time script is compiled, unique names will be generated (well, if you will compile it twice within one minute, names will be the same, obviously).

More complex scripts

With proper usage of NSIS almost everything is possible. Lets assume that we want to update PRODUCT_TIMESTAMP constant every day and increment PRODUCT_BUILD each time NSIS script is compilled.
The following code example demonstrates how to use text file to save version information:
File LastBuild.txt must contain two strings:
!define LAST_TIMESTAMP 13212
!define LAST_BUILD_NUMBER 0

Script will take last timestamp and build number from file, update them, and save in the same file again.

Using existing version file

Very often installer is created for application that already have its own version.
In this case installer version must be the same as program this installer is created for.
Lets assume that application version is stored in some source file of your program. The following code can be used to retrieve it when compiling NSIS script:
File vesion.h must contain following string:
#define APP_VERSION 1,0,13317,1437

For Microsoft Net applications, one can use the following searchparse: You got the idea - any text file can be parsed for version constants.

File properties

NSIS have built in commands ( VIProductVersion and VIAddVersionKey) that can be used to set properties of the installer file on compile-time. Defined constants and variables can be used as parameters:

Wednesday, December 18, 2013

How to set Notepad++ as default editor for Tortoise GUI

Introduction

Nowadays using version control system for your code is mandatory even for small projects. And, although you can do anything repository related from console, using GUI gives some obvious advantages - graphical repository tree, merge and diff tool, code viewer and so on.
Tortoise is a great graphical interface for various version control systems, such as Mercurial Hg or SVN. Tortoise for Windows use Microsoft Notepad as default text editor/viewer. And, as you know, notepad isn't so great - it lack syntax highlighting, code page change and unicode support. Its good because its default (every Windows PC has it) and can be used to fast edit some files, but there are better (and free too) alternatives.
My personal choice is Notepad++ editor. It has every single thing programmer need and even more.
So, it was a little disappointment for me, when I clicked on "View at revision" in file context menu of TortoiseHg workbench, and suddenly plain black and white window of standard Notepad popped up.

How to fix it

Hopefully for me, setting Notepad++ as text editor for Tortoise isn't hard. There are few simple steps you need to do:
  1. Go to folder with any repository, right click on it hover on "Tortoise" menu, and find "Global settings" in context menu:
    TortoiseHg context menu
  2. Find "Visual Editor" field (see picture below)
    TortoiseHg Global Settings

  3. Copy following string in this field:
    "C:\Program Files (x86)\Notepad++\notepad++.exe" -multiInst -nosession (with quotation marks). Obviously, if you installed Notepad++ in different folder, change path to application. Command line parameters used are -multiInst (open every file in new window) and -nosession (do not load previously opened files and do not save file history after Notepad++ window is closed).
  4. Press "ОК" button to save settings.
That's all. Now working with Tortoise will be even more enjoyable.

Sunday, December 15, 2013

Shipping Visual Studio redistributable package with NSIS installer

Introduction

The Microsoft Visual C++ Redistributable Package installs runtime components of Visual C++ Libraries required to run applications developed with Visual C++ on a computer that does not have Visual C++ installed.
Its pretty obvious that most clients computers won't have any development software installed, so it is good idea to include appropriate version of redistributable package in your NSIS installer along with your application files.

Implementation

First you need to download appropriate redistributable package from Microsoft website. The package must be same version that Visual Studio you use, including service pack version.
To make things more simple, create variable in your NSIS script  with the path to folder where redistributable is contained, and rename file so you can easily recognize what version is it.
Next, you need to copy redistributable package on the client machine during installation session and run it like this:
Notice that redistributable package is running with ExecWait and not just Exec command, and that /passive and /norestart flags are used. In such a way user have no choice except to wait until redistributable is completely installed.

Improvements

This simple script will work, but there are still some issues that can be fixed.
First one - we need to run our install script as administrator on Windows Vista/7/8 to be sure it will work properly. To do so, we need add this line of code somewhere in script:
RequestExecutionLevel admin
Second (and more complex) problem is to check if user have installed redistributable already. It can be pretty annoying to run redistributable install over and over again although you have installed it before with some other application.
Fortunately for us, we can determine if required redistributable package installed or not very easy. For every package installed there is special key in Windows registry. Registry path for it looks like "HKEY_LOCAL_MACHINE\SOFTWARE\Microsoft\Windows\CurrentVersion\Uninstall\[ProductCode]", where [ProductCode] is special code used to redistributable. For example, for Visual Studio 2010 codes are:
Visual C++ 2010 Redistributable Package (x86) - {196BB40D-1578-3D01-B289-BEFC77A11A1E}
Visual C++ 2010 Redistributable Package (x64) - {DA5E371C-6333-3D8A-93A4-6FD5B20BCC6E}
Visual C++ 2010 Redistributable Package (ia64) - {C1A35166-4301-38E9-BA67-02823AD72A1B}
Visual C++ 2010 SP1 Redistributable Package (x86) - {F0C3E5D1-1ADE-321E-8167-68EF0DE699A5}
Visual C++ 2010 SP1 Redistributable Package (x64) - {1D8E6291-B0D5-35EC-8441-6616F567A0F7}
Visual C++ 2010 SP1 Redistributable Package (ia64) - {88C73C1C-2DE5-3B01-AFB8-B46EF4AB41CD}
For other versions use Google (or just install redistributable on your own computer and find Product code in registry, using DisplayName subkey).
The best way to do this operation in NSIS script is to use some function, like this one: It will try to read Version subkey of product branch (Microsoft Visual Studio 2010 Service Pack 1 in this example) in windows registry, and store result in $R0 NSIS register.

Script code

It's time to gather all these parts together:

Friday, December 13, 2013

Creating file associations in NSIS installer

Introduction

File association is a common thing for all modern operating systems users. Associated files have its own unique icon (usually it looks like icon of the application they are associated with) and one can open file simply by clicking on it - program will be started automatically and file will be loaded in work environment.
Our  goal is to create NSIS script that will do all the work - and after installing selected file extensions will be associated with our program.

How it works (Windows registry)

All information about file types, associations and programs is stored in HKEY_CLASSES_ROOT branch of the windows registry. To associate our application with selected file extension we need to create two sub keys: first one for extension we want register and second one for our application (rule of how to pass file name from shell to program).
For example: imagine we have application that is called "AwesomeProgram.exe", and file extension ".apf " which we want associate with it. In this case first key that need to be created must be the same as extension (with dot!). Set default value of this key to any string you want - good choice is our application name. So, let it be AwesomeProgram.
The second key must be named exactly as extension key default value (AwesomeProgram in our case).
There are two keys exported from registry:
So, when user double click on MyData.apf file, windows search registry and found, that apf files must be opened using AwesomeProgram. Then it uses shell open command, passing path to file MyData.apf as %1 parameter.
That's all, now just two simple steps left to make it work.

Application 

One obvious thing we need to do is to add some command options parsing possibilities to our program - when running from command line with "-f path\to\file.apf" keys it must open file immediately after loading.
Second, not so obvious, thing is that when started by this way (user clicking on file in some folder of his computer), working directory of the application will be set to file location. So you need be sure that you always use full paths for all files you need - shared dlls, resource files, help files, translation files and so on. The best way to do it is to save installation location in registry (you can do it easily with NSIS), and  read it when applications starts before doing anything else.


NSIS

Finally, fun part. You can do it with, literally, two lines of code in NSIS script.

That's all! Don't forget to delete created keys in uninstall section (using DeleteRegKey NSIS command).